Tuesday, February 3, 2015
Working The Stem
The title pretty much says it all. This week has been devoted to gluing up, cleaning up, and beginning encapsulation on the stem. This piece is made from three pieces of 3/4 inch marine grade plywood, cut to shape and then laminated together with thickened epoxy.
The process is, coat the parts with an initial coat of unthickened epoxy, followed by a coat of thickened epoxy (before the initial coat has set up). Then lay the two parts together in the jig and connect together with bronze wood screws. As always, the holes should be pre-drilled. A few screws should be driven home to insure the parts stay aligned before drilling the remaining holes and driving the remaining screws.
It took me three evenings to sand down the glue that squeezed out. I am always careful about not applying too much pressure when attaching the parts together, but I also tend to liberally coat with resin, so inevitably, there is squeeze out. The reason it took so long is because my air compressor is inadequate to maintain high enough air pressure to efficiently run the high speed grinder I sanded with. Also, I was short on sanding discs and they tend to get dull fairly quickly when sanding epoxy.
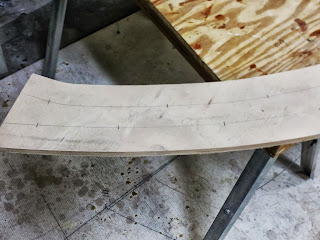
Before beginning the glue up process, it is advisable to have as much ready to go as possible, since the resin will want to kick off as you get near the end of the process. So I measured out and marked the screw holes beforehand. The holes near the outer edge must be far enough back from the edge to avoid interfering with future fairing of the stem forward edge.
The forward edge of the stem will eventually be where the two sides of the skin of the boat meet at the bow. The cross section of this area will be changed from square as it is currently, to more triangular shaped. This is because the forward edge will be planed and sanded down so the skins lie flat on the forward part of the stem. I will illustrate this in a future posting.
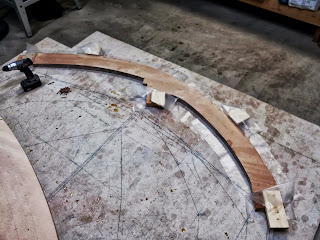
A simple alignment jig was used to keep the parts in alignment while the gluing and fastening process was accomplished. It is important to cover the area beneath the stem with wax paper, as well as the alignment blocks, so that they dont get glued to the stem. Once the parts were screwed together, the blocks were removed and some squeezed out glue was cleaned up.
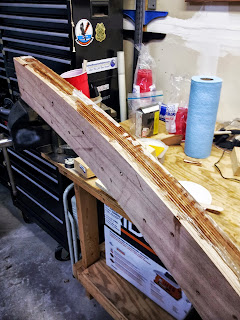
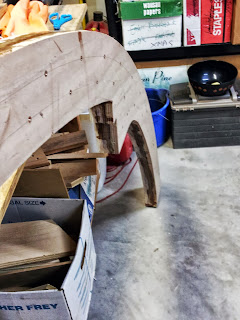
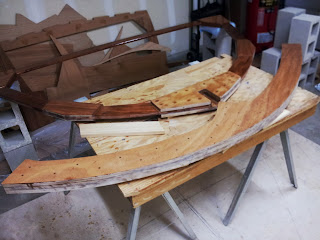
Here is the stem after the epoxy has cured. Some areas of squeezed out resin were worse than others.
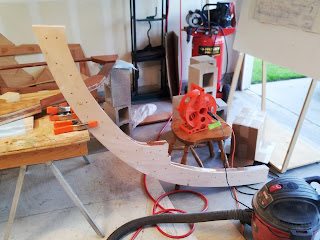
The sanding of the stem in progress.All edges needed to be cleaned up. I use the shop vac to suck up the dust as it is generated by the sander. This requires me to hold the hose in one hand and the sander in the other. Therefore, the part must be stabilized so it wont move. It is also important to keep the sander moving all the time so that dips and gouges arent created in the wood.
I try to keep a fairly light touch and sand gradually rather than trying to press hard and sand quickly. I only used the high speed sander on the edges and any large chunks of resin that might have gotten onto the flat surfaces. I used an orbital sander and a light touch to clean up the flat areas so there was less risk of sanding through the plies.
In addition to the vacuum, it is a good idea to have ventilation and a respirator or dust mask to keep from breathing the sanding dust.
After glue clean up, the stem needs to be coated with epoxy like the frames. Since this area is more likely to come in contact with water, I am giving it an extra coat of epoxy. Like the frames, there is no point in coating the outside edge yet, because this edge will receive considerable planing and sanding later in the build. I am coating the inside edge, however, since little structure will be attached to that edge. In the areas where the frames are attached to the inner edge, I am only applying an initial coat of epoxy since more resin will eventually be applied there as well.
This process should take a few more days. I will also begin work on the knee. The knee is a "L" shaped brace that connects the keel to the transom. This will be described and illustrated in a later article. Thats it for this week.
The process is, coat the parts with an initial coat of unthickened epoxy, followed by a coat of thickened epoxy (before the initial coat has set up). Then lay the two parts together in the jig and connect together with bronze wood screws. As always, the holes should be pre-drilled. A few screws should be driven home to insure the parts stay aligned before drilling the remaining holes and driving the remaining screws.
It took me three evenings to sand down the glue that squeezed out. I am always careful about not applying too much pressure when attaching the parts together, but I also tend to liberally coat with resin, so inevitably, there is squeeze out. The reason it took so long is because my air compressor is inadequate to maintain high enough air pressure to efficiently run the high speed grinder I sanded with. Also, I was short on sanding discs and they tend to get dull fairly quickly when sanding epoxy.

The forward edge of the stem will eventually be where the two sides of the skin of the boat meet at the bow. The cross section of this area will be changed from square as it is currently, to more triangular shaped. This is because the forward edge will be planed and sanded down so the skins lie flat on the forward part of the stem. I will illustrate this in a future posting.

A simple alignment jig was used to keep the parts in alignment while the gluing and fastening process was accomplished. It is important to cover the area beneath the stem with wax paper, as well as the alignment blocks, so that they dont get glued to the stem. Once the parts were screwed together, the blocks were removed and some squeezed out glue was cleaned up.


Here is the stem after the epoxy has cured. Some areas of squeezed out resin were worse than others.

The sanding of the stem in progress.All edges needed to be cleaned up. I use the shop vac to suck up the dust as it is generated by the sander. This requires me to hold the hose in one hand and the sander in the other. Therefore, the part must be stabilized so it wont move. It is also important to keep the sander moving all the time so that dips and gouges arent created in the wood.
I try to keep a fairly light touch and sand gradually rather than trying to press hard and sand quickly. I only used the high speed sander on the edges and any large chunks of resin that might have gotten onto the flat surfaces. I used an orbital sander and a light touch to clean up the flat areas so there was less risk of sanding through the plies.
In addition to the vacuum, it is a good idea to have ventilation and a respirator or dust mask to keep from breathing the sanding dust.

After glue clean up, the stem needs to be coated with epoxy like the frames. Since this area is more likely to come in contact with water, I am giving it an extra coat of epoxy. Like the frames, there is no point in coating the outside edge yet, because this edge will receive considerable planing and sanding later in the build. I am coating the inside edge, however, since little structure will be attached to that edge. In the areas where the frames are attached to the inner edge, I am only applying an initial coat of epoxy since more resin will eventually be applied there as well.
This process should take a few more days. I will also begin work on the knee. The knee is a "L" shaped brace that connects the keel to the transom. This will be described and illustrated in a later article. Thats it for this week.
Subscribe to:
Post Comments (Atom)


0 comments:
Post a Comment